Showing posts sorted by date for query sourdough bread. Sort by relevance Show all posts

Tuesday, March 9, 2010

Refreshing Your Sourdough Starter

009

Leftover starter can be stored in your refrigerator for a few weeks, or longer in your freezer. When you’re ready for more sourdough bread, you’ll need to refresh the starter. It’s easy.

001

You should have reserved 1 quart of starter from your last batch. Remove the lid from your jar of leftover starter, place your starter in a large bowl, and allow the starter to come to room temperature.  Add one cup of rye flour plus enough water to make the mixture soupy each day, changing to a clean bowl, until 3 quarts are obtained. This takes about 3 days. Be sure that your starter goes through the bubbly, frothy stage again, and then it’s ready to use.

It’s important to remember to feed your starter at approximately the same time each day, and to store it in a warm, open area. That’s a little difficult to do if the weather isn’t warm, but on top of your refrigerator or beside a sunny window work well. I have a smooth, glass top stove which I allow my bowl to rest on after I’m done cooking and the glass is still warm. You don’t want to allow your starter to get too hot though. So, be careful if you do this.

028

There’s nothing quite like fresh sourdough bread. We enjoyed it last night sliced and topped with pizza sauce, cheese, hard salami, and mushrooms. Toasted in the oven for 10 minutes, it was an easy and delicious meal in minutes. We’ve also enjoyed it with apple butter or strawberry jam in the mornings. Divine! And it’s equally good with just a little butter alongside a bowl of chili or soup. Here are the links:

Sourdough Bread Starter

Easy Sourdough Bread

This is a very versatile bread, and it’s delightfully simple to make. I hope you enjoy it as much as we have!

Wednesday, March 3, 2010

A Recipe: Easy Sourdough Bread

028

This bread is amazing… and so easy to make. It just takes a bit of preparation beforehand. You’ll need to make sourdough bread starter first.

001

On day seven, feed your starter as usual. I’ve found that a 5 lb. bag of rye flour is enough to make two batches of starter. It takes a lot of flour to make the starter. Your starter should have gone through the bubbly, frothy stage. If not, try making it again from scratch, and be sure you feed it at the same time everyday and store it in a warm, open place.

008

Now, it’s a messy job when you’re dividing the starter. I used my one quart measuring bowl which has a pour spout to transfer it to jars.

005

Save one quart of the starter to start a new batch of starter, and use the remaining 2 quarts to make your bread. This recipe makes 3 large loaves that will keep for up to a week without refrigeration. If you don’t need that much bread at one time, or if you don’t have a HUMONGOUS dough bowl to mix it in, I would suggest using 1 quart of starter and halving this recipe (Half = 6 1/2 cups flour, 1 1/4 TBSP salt, 1/2 cup water, 1 quart starter).

009

I store my starter in the refrigerator in recycled glass jars. You could also freeze it, but be sure to leave plenty of head space in your jar. You also don’t want your starter to come in contact with metal.

006

Now, to make the bread, I use freshly milled spelt. You could also use whole wheat or kamut, but spelt gives the best loaf. It seems to rise better and make a slightly lighter loaf than whole wheat.

011

Add 1 cup of water and 2 1/2 TBSP salt to starter and stir until salt crystals dissolve. Slowly begin adding 13 cups of flour, stirring with a wooden spoon. Towards the end, it will be easier to mix with your hands. After all of the flour is incorporated, you may need to add an additional 1/2 cup of water if your dough is too thick. The dough should be soft, sticky, and pretty easy to knead.

012

Knead the flour right in your bowl, for about 15 minutes. This dough is stickier than most doughs I’ve kneaded, so don’t be alarmed. If you’re new to bread making and need a kneading tutorial, here's a good one with pictures. Just know that this dough will not be as smooth as the one pictured because they’re using white flour.

017

Do not punch the dough down. Gently pinch apart and shape into 3 loaves, or 5-6 smaller loaves. Cut slits in the top, cover with a dish towel, and let rise for 4-12 hours (it depends on how warm your house is.) You may bake in loaf pans or on a large sheet pan.

023

Man, oh man, was that a lot of dough!

I will probably do half as much next time.

027

I turned my oven on for 5 minutes, turned it off, and allowed my dough to rise (covered with a towel) inside my closed oven for 4 hours. When your dough has doubled in size, cook it at 350 degrees for 1 hour. If you like, rub butter over the top of the hot loaves after cooking.

064

I wish you were here to smell and taste this sourdough bread! Quite honestly, it is the very best bread I’ve ever tasted. And I’ve made many, many loaves of bread. It’s heavier than traditional sandwich bread, but has a wonderful heartiness and pleasantly sour taste. I’m serving it up tonight with a bowl of homemade chili. Yum!

Tuesday, March 2, 2010

Making Sourdough Bread Starter

Sourdough and Kitchen Before 018

Making sourdough bread starter is really easy. All you need are two LARGE bowls, a wooden spoon, measuring cup, cheesecloth (or flour sack type kitchen towel), a bag of rye flour (milling your own rye would be even better!), and some water. It takes 7 days before your starter will be ready for baking bread.

Sourdough and Kitchen Before 023

On day one, mix 2 cups of rye flour (you could use whole wheat flour, but rye gives the most consistent results) with 2 cups of cold filtered water. Be sure not to use metallic bowls or utensils.

Sourdough and Kitchen Before 040

Cover bowl with cheesecloth or a towel, securing with a rubber band if necessary, and leave in a warm place (the top of your refrigerator or beside a sunny window both work well if your kitchen is cool) for 24 hours.

082 This is what my starter looked like before feeding it on day three.

Everyday, for the next 6 days, feed your starter (at approximately the same time of day) 1 cup of rye flour and enough water to make the mixture soupy again. Usually, 1 – 1 1/2 cups of water will do.

086

Stir with a wooden (or plastic) spoon and transfer mixture to a clean bowl.

181

This is what my starter looked like before feeding it on day six. See all those bubbles? That’s what you want. It’s fermenting and that’s what will make your bread rise and taste yummy. It should have a slightly sour, wine-like aroma.

On day seven, feed it as usual, and the starter is ready for making bread. Save 1 quart of starter for your next batch of starter. If you’re not going to use the next batch of starter right away, store it in an airtight container in the refrigerator or freezer.

To start a new batch, place the starter in a bowl and add 1 cup of rye flour plus water each day, changing bowls, until 3 quarts are obtained.

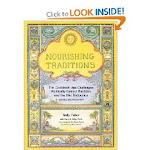
This recipe was adapted from my Nourishing Traditions cookbook. I can’t tell you enough about how wonderful this book is!!! It is my go-to cookbook. Very different from your usual cookbooks. Sally Fallon explains the ‘why’ to her recipes and offers a new (which is actually the way of old traditions) way to eat healthy. She encourages making everything from scratch. Yes, everything! Even things like crackers, ketchup, mustard, and of coarse, sourdough bread. This way, you know exactly what you’re eating. No harmful preservatives or icky additives.

I’ll share my Nourishing Traditions recipe for sourdough bread with you tomorrow!