Friday, May 9, 2008

Book Fair


I may be falling in love with my postman... just look at what he brought me today! I've been wanting these books for some time now, so I splurged and bought myself a little Mother's Day gift:

In Stitches by Amy Butler

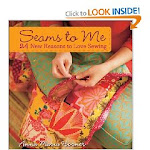
Bend-the-Rules: Sewing by Amy Karol

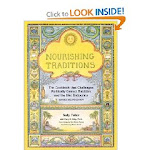
The Splendid Table's: How to Eat Supper by Lynne Rossetto Kasper and Sally Swift

Discerning the Voice of God by Priscilla Shirer

I got these for 40% off at Books-A-Million online, and they shipped for free, too. All you have to do is purchase one of those $15 "millionaire's club" cards and you get an extra percentage off eveything you purchase. They even email you coupons for free shipping, coffee, and other discounts useable both online and in-store. I wasn't aware how much more expensive books are in the actual brick-and-mortar stores until I went in last week with my son. I had already priced these online, and I wondered how much they'd cost in the store (I didn't want to wait a week on shipping if I could help it.) Most of these books would have been full price. And because I'm a bargain hunter, I know that these books couldn't be purchase any cheaper on amazon or ebay (*at the time I purchased them.) I'll let you know what I think of these as I finish them. Do you own any of these titles? And if so, what did you think? I just love a good book review.

Thursday, May 8, 2008

Sweet Completion


I'm excited about the way this top turned out. Once I finally got a chance to sit at my machine, it went together easily and sewed up in a snap. In my vision, the top had a pretty ruffled bottom edge, but I was so stinkin' ready to finish at least one project this week, that I jumped the gun and put a straight hem at the bottom. I made the straps a little wider than the ones on the original top because they slipped off Sara Lynn's little shoulders too easily. I'm hoping this helps.


I did take the time to do the topstitching. It makes such a difference in the garment's appearance, and it makes it easier to launder. It only takes a minute or two, really. It takes longer to thread the bobbin and change the needle than it does to sew. I've learned to keep various colors of thread on hand (I use thick embroidery thread in a coordinating color for my topstitching) so it doesn't slow me down.


I'm wishing now that I'd added the pretty little ruffle to the bottom that I existed in my head. Oh, well. There's always next time, right? Now all I have to do is whip up some bloomers in that stripey coordinating fabric. I better get to it...

Wednesday, May 7, 2008

Bed and Breakfast Muffins


These are my favorite muffins. They're really simple to make and they're good for you, too. Healthy and tasty, you can't go wrong with these! The best part about this recipe is that you can make the batter in advance and store it in your fridge for up to 6 weeks. No joke.

6 c. Raisin Bran cereal
2 3/4 c. sugar (or Splenda)
5 c. flour (see notes)
2 T. baking soda
2 tsp. salt
2 T. cinnamon
1 T. nutmeg
4 eggs, beaten (or 8 egg whites)
1 qt buttermilk (reg. or nonfat)
1 c. canola oil (vegetable oil works, too)
1/2 c. nuts (optional)

In a LARGE airtight container, mix dry ingredients including spices. Add eggs, milk, oil, and nuts. Mix well. Store in refrigerator at least overnight before first use, and then up to 6 weeks. Bake in well greased muffin pan (foil liners work, but not the paper ones!) filled 2/3 full, at 350 degrees for 20-25 minutes.

Notes: You can use any type of flour you desire. I like to use a combination of 2 1/2 c. white, 2 c. whole wheat, 1/2 wheat germ. My friend Billie Scroggins, who shared this recipe with me, likes to put 1 tsp. strawberry jam in the center: spoonful of batter, then spoonful of jam, then spoonful of batter into tins. I haven't tried it this way because I love the muffins as they are.

I really wish you were here to share a muffin and a cup of coffee with me...

Tuesday, May 6, 2008

Sewing Inspiration


This top is the inspiration for a pattern I'm drafting this week. I didn't make this particular one, but it's one of my favorites. And it looks really simple to sew. So, I'm giving it my best shot and making a few modifications in the process. I'll let you know how it turns out.


Unfortunately, I've had MANY interruptions lately. All I've accomplished is the cutting, which is the part I love the least. On the bright side, I've gotten pieces cut for 2 tops, and I'll be able to get straight to sewing tomorrow. Have you ever had one of those weeks where nothing seems to be coming together? I'm hoping the rest of my week will be more productive.

Terrific T-ball

Getting ready...


Running like the wind...


He scores!!!


Victory speech... BLISS.

Thursday, May 1, 2008

My Happy Place

When I first started sewing, no one told me how important it was to have the "right" tools for the job. I was using my MIL's really old and really cheap brother sewing machine. It was such a pain to use - I would have random tension issues in the middle of every project and there was no variable speed - it was wide open every time I touched the foot pedal! Needless to say, I didn't sew much with it.

It wasn't until my aunt gave me her old Singer 6038 that I really began to fall in love with sewing. This wasn't a dream machine by any means (under $200 brand new and I never could sew a buttonhole with it), but it could sew beautiful seams. And more importantly, it would allow me to slow my speed as I sewed around curves. A love for sewing was born.

As I began to sew more, I realized there were a few things I really needed if I wanted to sew often:

1. A rotary cutter, mat, acrylic quilter's square and ruler - indispensable for quick and easy cutting of fabric. Get the largest mat you can afford, you'll use it. And get a good pair of scissors while your at it.

2. A great iron - I'm not talking about a $20 Walmart iron. You need a professional iron that will smooth through wrinkles like butter. There's nothing worse than spending 10 minutes pressing fabric only to realize those wrinkles aren't budging. I use a Rowenta D90 Professional Steam Iron, and I often wonder how I ever lived without it. It has cut my ironing time in half (happiness!).

3. The best sewing machine you can afford - this is where you really want to put the bulk of your sewing budget. If you don't love your machine, you won't love to sew. You can get a nice sewing machine for under $500. A small investment considering how long you'll be sewing with it. I've been extremely pleased with my Kenmore 19233 (which is actually made by Janome.) Do some research on Pattern Review, eBay and other sites with sewing machine reviews before you buy.


Let me introduce you to my happy place...


I could go on and on talking about sewing notions that make life easier. But this is a good place to start. These things have drastically improved my sewing experience.

Wednesday, April 30, 2008

Fabulous Fabrics


I've been naughty this week... added LOTS of fabulous fabrics to my stash. I think I'm done with the vintage looking fabrics, for a little while anyway. I was so surprised when I found these fabrics COMPLETELY irresistible (bought 3 yards of most of them, oops). They're not what I'm usually drawn to, but I can already see them on my little sweetie. And maybe a skirt for me. Are matching mother/daughter outfits too corny? Gotta go sew...

Tuesday, April 29, 2008

Diet Cola Brownies


Seriously, these are some of the best low-fat brownies I've ever had! They come out really, really moist and gooey. Just like every brownie should be. And you're not going to believe how simple they are:

1 can Diet Cola + 1 box Devil's Food Cake Mix = Low-fat Brownie Heaven!

Any brands will do. I used the Pillsbury brand Devil's Food cake with pudding in the mix, and I used Diet Pepsi, but your could use Diet Coke. If you use the whole can of cola, your brownies will come out more like thick chocolate cake. If you use 10 ozs. of cola, you get the gooey fudgey brownies I have come to know and love. Cook them @ 350 degrees for 12-15 minutes.


Maybe I'm the last person on the planet to try these... Maybe you already knew the secret recipe... But I'm guessing there are a few of you out there who are in the brownie dark, just like I was. My friend Katie told me about this old Weight Watchers brownie recipe last week, and I've already made them, twice. They're that good. No one in my household knows the difference. I have to go now... and eat that brownie!

Sunday, April 27, 2008

A Beginner's Sewing Tutorial: Baby Taggy Ribbon Blanket


Let me start by saying that the Taggies Brand blankets are protected by a patent and they may not be created for resale. I've heard that the Taggies people prosecute those who try to sell their patented products.

This tutorial is from one crafty momma to another who intends to use this blanket for her own personal use only.

I received a homemade taggy blanket as a baby shower gift for my daughter. I had never seen one before, but I loved it immediately. And I thought, that looks really simple to sew up... I bet I can figure out how to make one. It was my daughter's favorite toy for a very long time. Perfect for little hands just learning to grasp, these blankets are great for tactile development. Babies love the different textures and colors of these blankets, and they can be made in any size you desire. This tutorial was designed for those just beginning to sew, so bear with me if it seems too detailed for you.


I started with contrasting flannel fabric cut into 12 1/2 in. squares. You could use chenille or minky fabric instead, and it's better if you use 2 types of fabric (I just used what I had on hand.) A quilter's square and rotary cutter are not necessary, but they make this job much easier. Place the square on top of two layers of fabric, and cut along the edge being careful to stay against the square. (I'm making 2 blankets at one time, so I have 4 squares of fabric cut.)


Choose ribbon that coordinates (or contrasts, it's your preference) with your fabric. For my 12 inch squares (this will be the approx. finished size) I like to use 5 ribbons per side. Be creative - use different colors and textures. I use various widths of satin and grosgrain ribbons, and also something that looks almost like a wide flat shoestring/drawstring type material (I'm not sure what it's called.) I've even seen ric-rac used.


Cut the ribbon into 5 inch strips. I use the first ribbon as my cutting guide for the rest of the strips to save time. Then figure out the placement onto the blanket. I like to be sure I have a satin on each side and a wide ribbon on each side. I start with the middle ribbon placement and work my way out to the sides. Leave at least one inch between the ribbons and the sides of the blanket.


Next, fold the ribbons in half and pin them between the two fabrics with right sides of fabric together. The ribbons should be pointing inward toward the center of the blanket. This seems odd if you've never made a blanket before. But in the end, you'll see we flip the blanket inside-out to incase the seams. Trust me, it works.


After all the ribbons are pinned, put a row of extra pins marking a 3 inch spot on one of the corners which will not be sewn. This step can be omitted, but don't forget to leave this spot open. (I always get busy sewing and forget! The pins remind me.) This is the hole we'll use to flip the blanket inside-out.


Now, start sewing. I like to use a 3/8 in. seam allowance. That's about the width of my presser foot, so it's easy to follow. But use whatever seam allowance you're comfortable with, just keep it as consistant as possible. Before you start sewing, do a couple of backstitches to lock the threads. (this keeps the threads from coming undone.) Straight stitch right on top of your backstitches.


Pause when you get to the pins, removing each one as you sew. (I have a friend who just sews straight over her pins and rarely breaks a needle. I tried this once and kept breaking needles! I always remove my pins as I sew.)

When you get to the corners, stop sewing - leaving your seam allowance before reaching the end of the fabric. Lift your presser foot and turn the fabric so you can sew the other side.

When you get to the row of pins, stop and backstitch a couple stitches to lock the threads in place. Now remove the blanket from your machine and trim your loose threads where you started and ended. Remove the pins, there will be one loose ribbon that you need to set aside and attach later.

Trim the corners, being careful not to cut your stitches.

Find the hole in your fabric, and pull the entire blanket inside-out, through the hole.

Insert a closed pair of scissors into the hole and use the tip to make your corners have perfect points. (There is a tool you can buy to do this if you're afraid you'll rip your fabric. I haven't needed one. Just be careful!)

Now tuck the raw edges of the hole inside the blanket, being careful to keep the edges straight across the top of the blanket, and keep the corner squared. Iron the seam into place, and iron the rest of the blanket being sure not to touch the iron to the ribbons - they will singe! I learned this the hard way. I pull the ribbons out slightly as I iron to keep the seam from being puckered or wrinkled.


Get the last ribbon and pin it into place. You can either stitch the hole closed by hand or use your machine.

I like to use my machine. Keep the stitching as close to the edge as possible, remembering to backstitch at the beginning and end.

If you use a coordinating thread, it isn't very noticable.

Now, change your needle to a topstitching needle (it's okay if you don't have one, use the largest needle you have on hand. You can even use the needle you've been using, but the results will be a little nicer with the topstitching needle.)


This step can be omitted, but it makes the item easier to launder. On either side of the blanket, start in a corner and stitch all the way around the blanket using your desired seam allowance. Remember to backstitch at the beginning and end. Iron one last time.

One done, and one more to go!

Have fun!

Saturday, April 26, 2008

Butterick B4783 - Girl's Swing Top


Okay, I have a new favorite pattern! I think this one came out quite fabulously, if I do say so myself. It pairs nicely with Jackie Clark's Britches and Bloomers, don't you think? I had originally intended to sew a ruffled edge to the bottom, but after trying it on my princess, I thought it would be too long.


This pattern was pretty easy. It did take me a little while to figure out what the pattern was instructing me to do, but after reading through it a couple of times I was good to go. There are 6 variations of this outfit in the same pattern package (which was part of my confusion) and it includes patterns for a top, skirt, and shorts. I purchased it in sizes 2, 3, 4, and 5 but it is also available in larger sizes.


I should tell you that this pattern runs big. Sara Lynn wears a size 2 in most clothes, but this size 2 is a bit loose on her. I'm not complaining - she's growing fast and I'd rather it be too big than too small!


I'm very happy with the way these fabrics work together. I just love vintage prints in shades of pink, cream and white. I'm having a blast dressing this little sweetie!